Color Labels
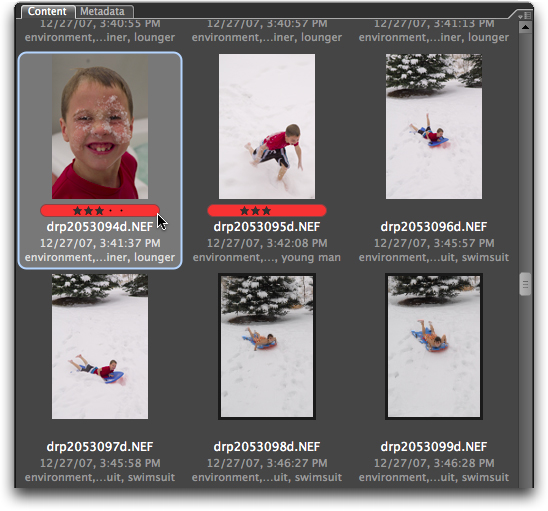
Some of the viewing panes within Bridge allow you to see both color labels and star ratings. Rating and ranking your images helps note the very best images within a set. It can quickly separate "record" shots from those you might feature in your portfolio or final project. You can set Star Ratings for an image or group of images using the Command/Control, plus the 1 through 5 keys.

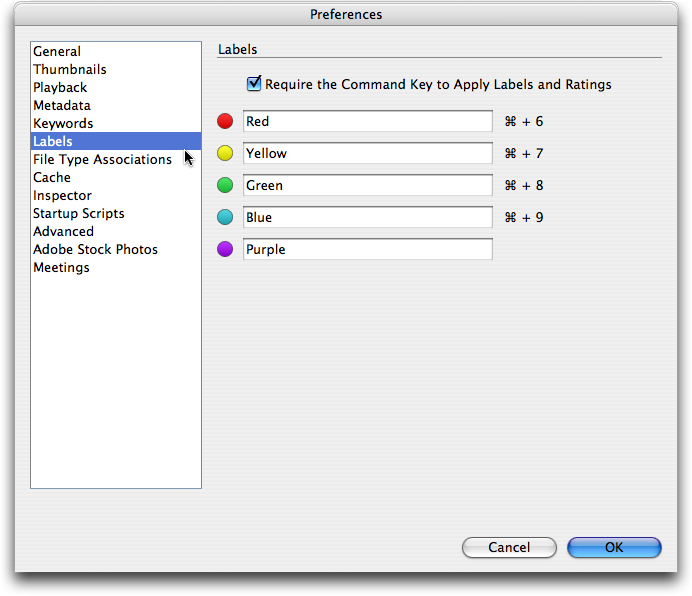
In order to properly exchange the color label values, you must set the preferences for Labels to be the same as in your other applications, such as Lightroom and Photo Mechanic, that store this XMP value. Some applications, such as iView Media Pro and Expression Media, do not use this information.
Again, open the Preferences dialogue under the appropriate menu item, or use the Command/Control, plus K hot key combo.

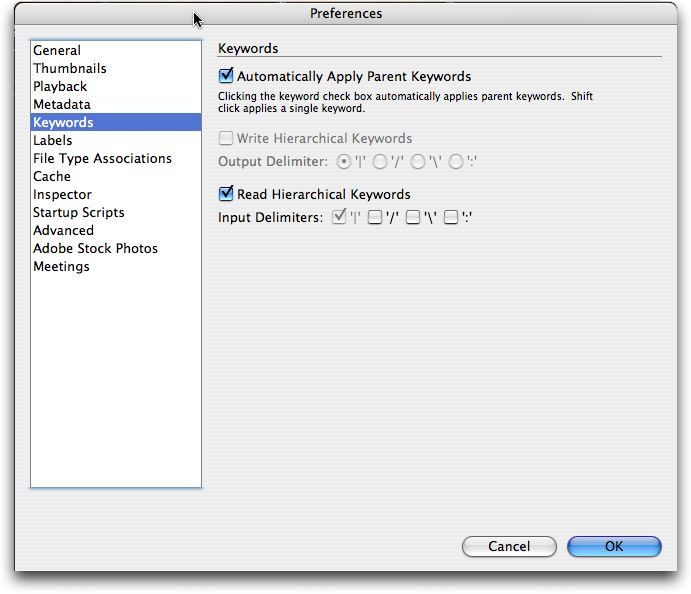
Depending on your involvement with keywording, you may also set up your Bridge Keyword preferences (shown below) to automatically apply the parent keywords within a keyword hierarchy. Bridge 2.1 (CS3) or later allows you to create or import a hierarchical keyword catalog with broad terms, such as "animals," that can narrow down to specific terms, such as breeds of dogs or birds. If you also use Adobe Lightroom, you'll want to check the box to "Read Hierarchical Keywords" so keyword information entered in Lightroom displays properly in Bridge.


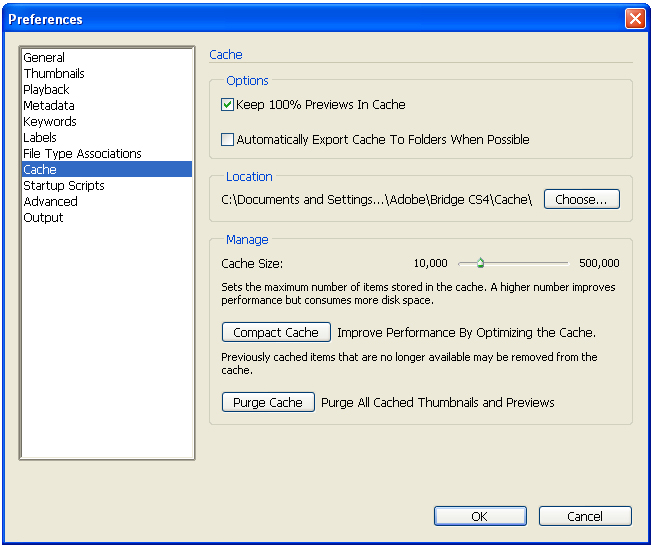
While Adobe Bridge is considered an image browser, the Bridge cache improves performance when returning to the same folder of images. Metadata, previews and thumbnails are stored in this cache so they don't need to be created each time you visit that folder. This same cache helps search and find files you have previously browsed, but have not yet viewed in Bridge. Bridge is not the same as cataloging applications, since its changes to metadata are immediately written to the original file (or its XMP sidecar for RAW formats). If you reopen a folder in Bridge, it will automatically re-read the metadata from the files when the modification dates are later than those in the cached record.
Setting preferences for pane views
For Bridge 2.1 (CS3):
From the Window menu, choose Workspace and then Reset to Default Workspace. Next, choose Command/Control F4 to see the Metadata Focus view, where the lower left displays a Metadata panel.
Or simply choose the Metadata Panel option from the Window menu, which will pull the Metadata panel to the foreground.
For Bridge 3.0.0 (for Creative Suite 4):
From the Window menu item, choose Workspace and then Reset Workspace or Reset Standard Workspaces. You can then choose Command/Control F3 for the Metadata focus view.
